Korilakkuma Macarons Recipe Tutorial
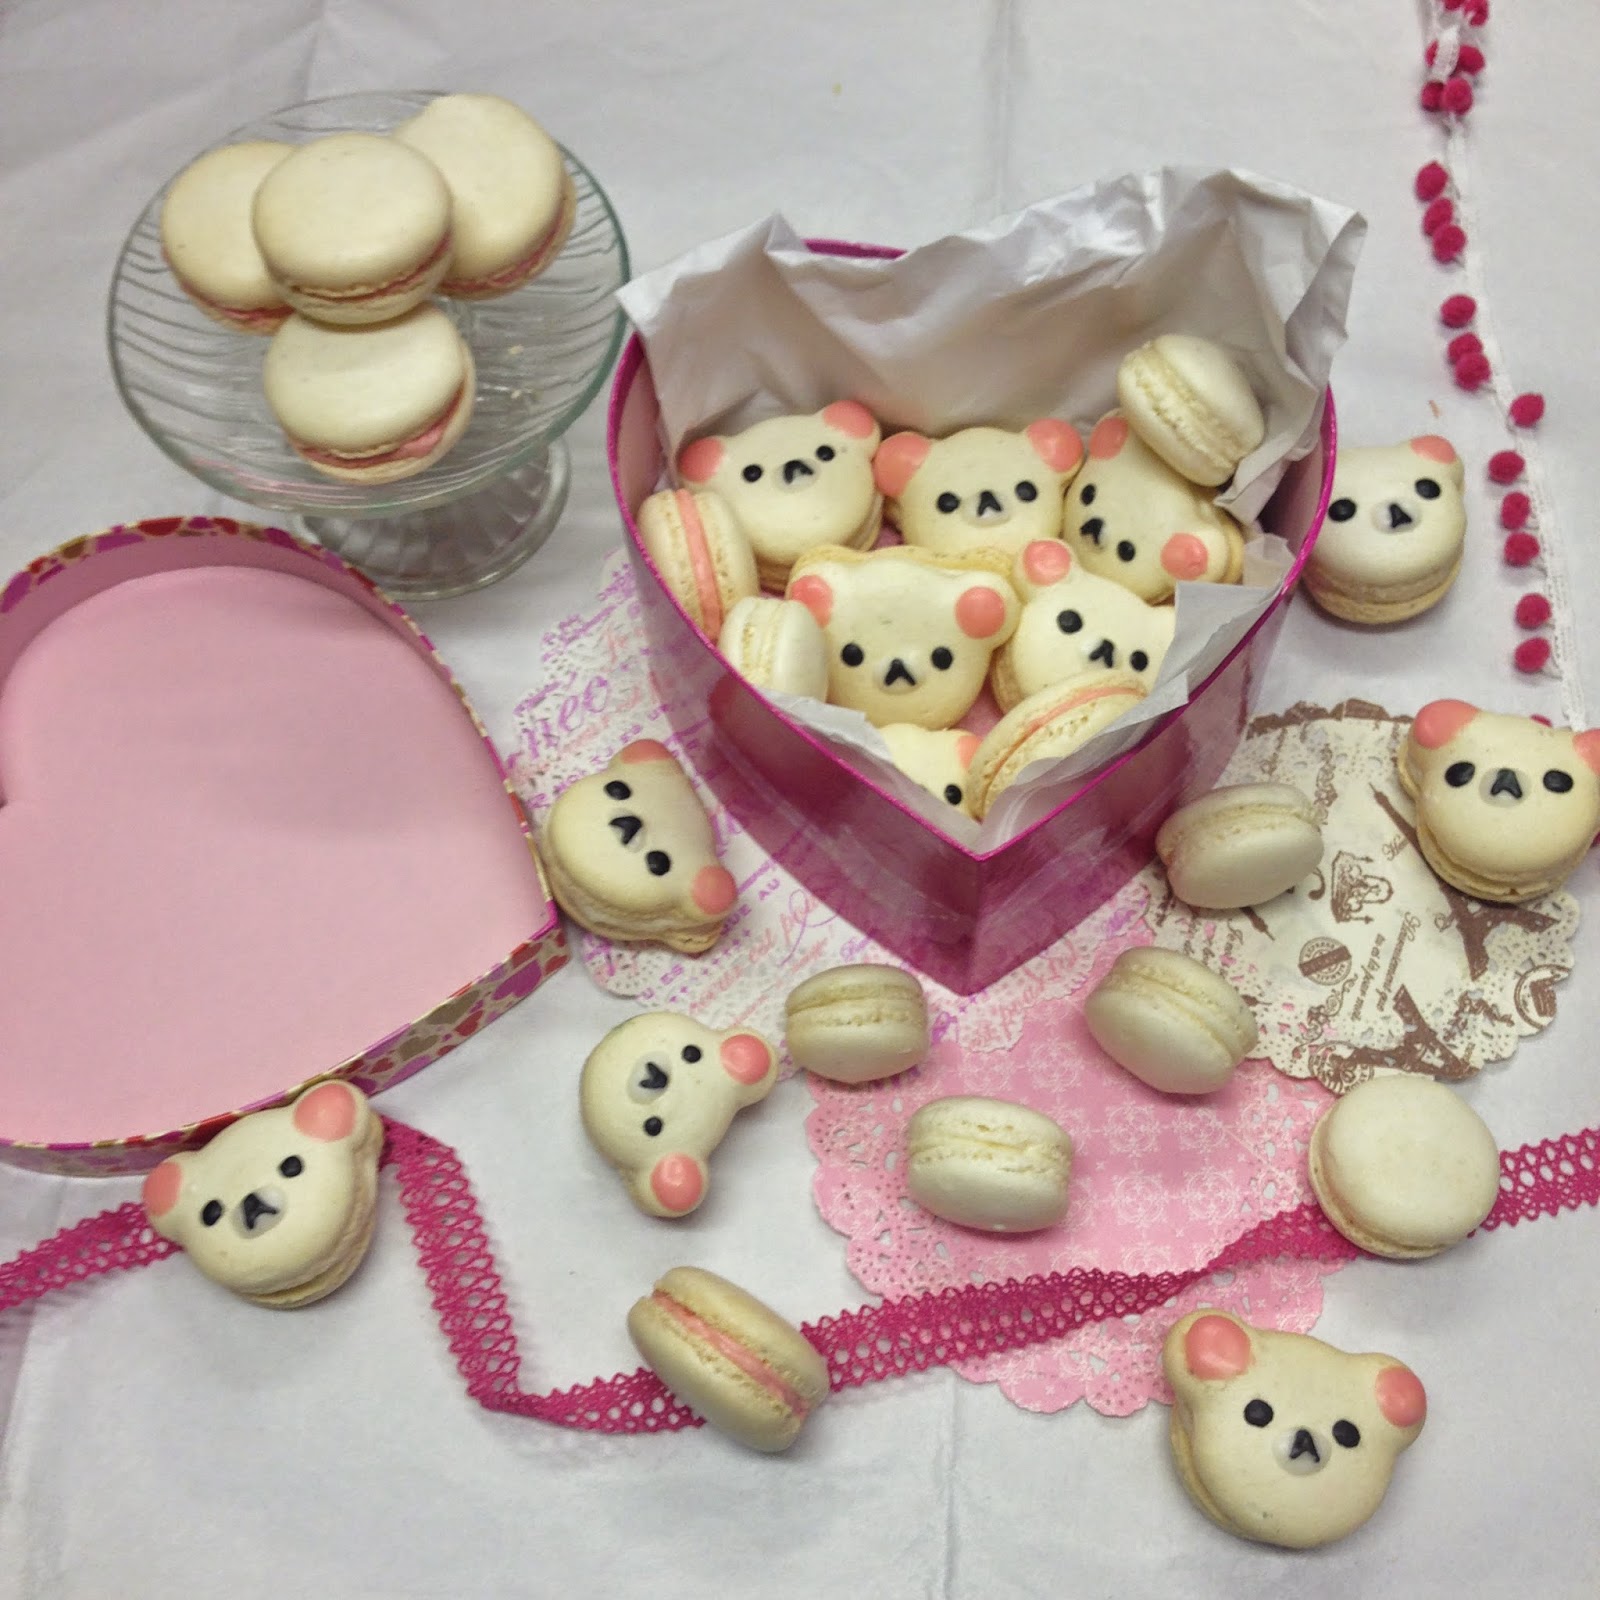
I'm very excited to share with everybody on the internet today something that is very easily the most adorablest thing I've ever made in my life. Korilakkuma macarons. Valentine's day is coming up and this would be sure to impress your sweetie. Or if you have nobody, you can make these for yourself. /foreveralone/ I used my "Almost Fullproof" macaron recipe that I will only forever use until I find something that's better. As I've mentioned before this recipe uses the Italian Meringue method, making a very very strong meringue to work with, which is great for these delicate little cookies. I don't like it when websites with recipes redirect you 12 different pages to view recipes so I'm just going to have everything here re pasted from another entry of my blog with a few add ins. And stuff everything you need to know into this one page. I'm currently still editing the video, but once its ready I'll add it into this blog. *Update: Video is done editing, I posted the video right underneath the directions of this recipe. Enjoy everyone :)*
MACARON RECIPE
For Macaron
120g egg whites, divided (60g/60g)
35g sugar
150g finely ground almonds
150g powdered sugar
Optional: dash of cream of tartar to stabilize eggs
Simple Syrup
150g sugar
50g water
Buttercream Filling:
1 cup of butter
3 cups of powdered sugar
1 1/2 tsp of vanilla
1 tbsp heavy cream
(or entirely up to you. Ice cream, nutella, buttercream, anything!)
Decoration, the icing:
1 1/2 cup powdered of sugar. (1/2 cup for each color, white, black, pink)
Water
Black and red/pink food coloring
1. Start of by first whipping up your 60g of egg whites to soft peak in a mixer. Once it gets a little bubbly, add in a dash on cream of tartar to stabilize the eggs. Once it reaches soft peak, slowly sprinkle in your 35g of sugar a little bit at time. While your egg whites are whipping, make your simple sugar by heating up 150g of sugar with 50g of water in a pan until it reach 220F.
2. On low speed, while the syrup is still hot, pour the syrup into the mixing bowl, make sure the syrup hits the bowl, before trickling down into your whipped whites. Continue whipping until have a strong shiny meringue.
3. I would get one of the sifters that you just need to turn for this, to make the process more faster. But sift 150g of powdered sugar and 150g of powdered/flour almonds together into a bowl. It is said it is best to use this in a food processor for better results, but I just sifted it twice, and that it was fine.
4. Add in the remaining egg whites into the bowl, and fold. At this point if you want any food coloring, add them now.
5. Fold in your meringue/whipped whites, but at first use only 1/4, very gently fold, and keep adding 1/4 at a time. The mix would be too stiff at first and would deflate your batter.
6. I totally recommend using a sturdy half sheet pan, and a silpat mat over it. Pipe your macarons onto the mat, 1 inch in between, each a quarter size. They will flatten during the resting/drying period, so make sure there is space in between. If you want even sized cookies, either trace circles on a piece of paper and have it behind the mat. That's a bit too much effort for me, so I just count to 3*depending on how hard you pipe* on each macaron you pipe. You want your piping tip perpendicular to the baking tray, and when you finish off piping, do a slight twitch-swirl so you don't get pointy ends. Give your macarons bear like features and pipe two small ears on the almost sides of the circles, and bit close to the circle for a natural or cuter bear look
7. Tap the tray 2-3 times. Poke out any air bubbles with a tooth pick. Let the macarons dry/rest for 1-2 hours. Or until when you touch it, it doesnt stick to your finger. This is so you can develop feet for you macarons by the skin they produce on the top of your macarons. *meaning very important that you leave your macarons until they dry out/look dull* But this is a Italian meringue method, you may or may not have to do this since the batter is so strong. I've always done resting periods, regardless. Bake at 320F for 15-25 minutes depending on the size of your macarons. I sometimes change it up and use 285F for 20 minutes, if I realize my macarons are rising a bit too quickly and are cracking
Icing Cookies:
With three separate small bowls, Sift 1/2 cup of powdered into each. Adding a 3-5 drops of water into each and mixing. Keeping one bowl free of food dye to keep white, and the other two dyed pink and black. I got wax paper and made a paper cone out of it to pipe the faces. But you can use parchment paper, or a piping bag with a small piping tip. (around a 1 or 2, but I haven't used it with a piping tip yet)
Using the white icing pipe a white oval for the mouth. And using a tooth pick I dragged it around until it formed a perfect white oval. I wasn't very generous with the icing, and piped things very sparingly and used my toothpick scribble on my faces. Depending on the consistency on your icing, you may have to be careful with the amount of icing you initially add on. Pipe pink circles for the ears. Using a tooth pick trace the pink circle wider Pipe black eyes. Using a tooth pick track the black eyes wider. Once the white oval center is dry pipe on an upside down V Or pipe a dot and using a tooth pick drag down the dot to make an upside down V
VIDEO TUTORIAL


PHOTO TUTORIAL

Checklist:
Tools:
1) Kitchen aid mixer with whisk attachment and the smaller sized bowl. (plugged in and ready to go)
2)One small pot
3) Sifter that uses a knob turn around thingy to sift your dry ingredients quickly
4) Spatula (that pink thing in the pot used to fold ingredients)
5) Whisk
6) Medium sized piping bag
7) Wilton 12 round piping tip
8) Half sheet Silpat mat (Can be bought from amazon, Bed bath and beyond with a 20% off coupon)
9) Onenida kitchen thernometer
10) Toothpicks
Ingredients all weighed out:
120g egg whites, divided (60g/60g)
35g sugar
150g finely ground almonds
150g powdered sugar
dash of cream of tartar to stabilize eggs
150g sugar
50g water
 |
| All the ingredients measured out in 7 bowls. Everything except for the cream of tartar is shown here. I put them in order of all the steps so I could just grab them and go down the row. |
 |
| I'm mixing my 60 grams egg whites on 7-8 speed on my kitchen aid mixer. Once the whites have some foam/bubbles I will add in a dash of cream of tartar and beat until its soft peaks. |
 |
| Once it is soft peaks I will slowly add in my 35 grams of sugar, sprinkling only a little at a time. Then one I run out of sugar to sprinkle I will start on the simple syrup, which is super simple. |
 |
| In a small pot I add in 50 gram of water, and then 150 grams of sugar. I gave my pot a little shake so the sugar would be even. Then I turn on the heat to medium high heat. I want to heat this up to 220F |
 | ||||
| I'm using a Onenida thermometer to test the temperature of my syrup. I lift my thermometer stick slightly so it doesn't touch the bottom of the pan because I don't want the reading of the pan, I want the temperature of the syrup |
Next you, pour the simple syrup onto the mixing bowl, mixing a speed 4. Letting the syrup trickle down onto the meringue. Do not pour the syrup directly onto the meringue. Increase the speed to a 7 and continue beating it until it forms stiff peaks.
Sift together your dry ingredients 150 grams of powdered sugar, and 150 grams of almond flour. I took a whisk to combine the two then sifted mine about two times afterwards.
Add in your 60 grams of egg whites. This also when you would normally color your macarons. But I'm making white rilakkumas so food coloring is not needed. (But if any of you want to color it, do it now)
Fold together your meringue and dry ingredients. Add 1/4 of your meringue into the dry ingredients, folding it to moisten the dry ingredients. And very gently fold in the rest of your meringue 1/4 at a time.
To pipe the bears I first made a circle and added ears on the side.
Tap the tray lifting it four inches off the table, dropping them, turn them around and do the same to clear out any air bubbles. Any remaining bubbles can be popped with tooth picks very gently.

 |
| I let my macarons "rest" for 1.5 hours You will get a dull like appearance on your macarons. This is so you will get "feet on your macarons" To get this you must have a dry top shell, so during the baking process the air cant escape to the top and crack open, and the only way it can go is down, forming feet. To find out if your macarons are ready for the oven, touch the top of your macarons very carefully and gently within a time frame of 30minutes-2 hours and they should not stick to your fingers when you touch the tops. Bake in a preheated oven in the middle rack for 285 F for 20 minutes long. |


 |
| I made some buttercream for filling. Mix 1 cup of butter in a mixer for 1 minutes, and adding 3 cups of powdered sugar at one cup of a time, then adding 1 1/2 tsp vanilla, and 1 tbsp of heavy cream |
 |
| First lay out your cookies and see which cookie matches with which, and pair them up. Fill them with your desired fillings. |
 |
| Make white, black, and pink icing. Using 1/2 cup of powdered sugar. and adding 4-5 drops of water until you reach the right piping consistency. and color one bowl pink and the other bowl black. I used wax paper and turned it into a paper cone to pipe on the face. But you may use a a piping bag with a tip if that makes things easier, or use parchment paper and turn that into a cone. I used wax paper because that was the only thing they had in my store. |


 |
| Pipe on the white mouth and let it dry. Pipe on pink circles for ears. Pipe on tiny eyes and using a tooth pick drag out your circle to make them bigger. Pipe on the upside down V for the mouth. Or start with piping on a dot and dragging it out to make an upside down V |


Thanks for following along. I hope you enjoyed the pictures and the instructions were somewhat helpful. If you need any help or need some clarifications on any parts of this recipe or any other recipe, feel free to ask/contact me.
instagram: hungrymoomoocow
https://www.youtube.com/user/hungrymoomoocow

Wonderful as nothing I've seen
ReplyDelete